Adding a Prescription Note
Select the applicable tab for your province to learn more about adding prescription notes.
Notes can be added to the prescription authorization (Create) or its dispense on the EHR.
-
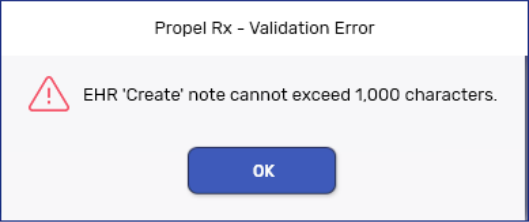
Create notes are entered by the prescriber or pharmacy on behalf of the prescriber. They can only be entered at the time of creating a prescription. A maximum of one Create note up to 1000 characters can be entered.

-
Dispense notes are entered by the pharmacy that performed the Dispense. They can be entered at any time by the pharmacy who submitted the Dispense. A maximum of one Dispense note up to 80 characters can be entered.
By default, all Historical notes entered in the Rx Detail Notes tab prior to the PPM upgrade will have the EHR checkbox and Dispense option selected for the note.
Submitting Notes Before Filling a Prescription
Before filling a prescription, you can enter prescription notes from the following locations.
To enter prescription notes from Intake:
-
From the Workbench, Patient Profile, or Fax tile, select Intake.
-
If your pharmacy has Clinical Review or E-Dialogue enabled, ensure the Data Entry tab is selected.
-
Enter the prescription details.
-
In the Notes section, select the + button.
-
Enter the note text in the given field.
-
Process the prescription as per usual process.
-
The note will be visible from the Notes tab once the prescription is processed into Rx Detail.
-
The EHR flag for the note will default to OFF. To send the note to the EHR, select the EHR checkbox in the Rx Detail Notes tab. For more information, see the process from Rx Detail.
-
To enter prescription notes from Rx Detail:
-
Process a prescription until it reaches Rx Detail.
-
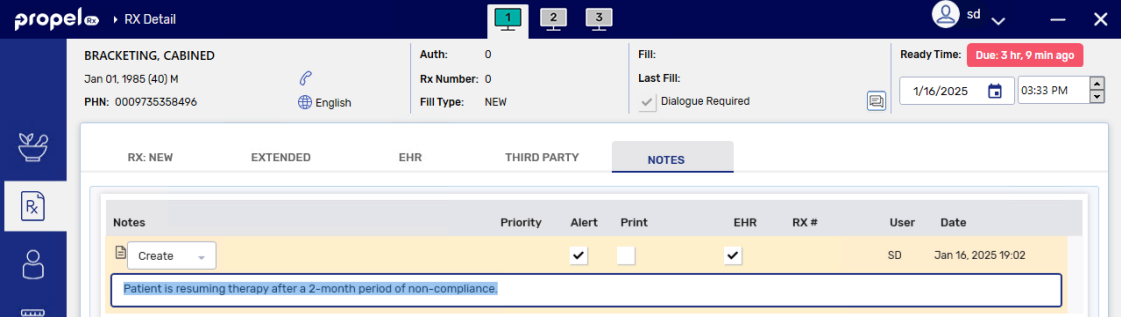
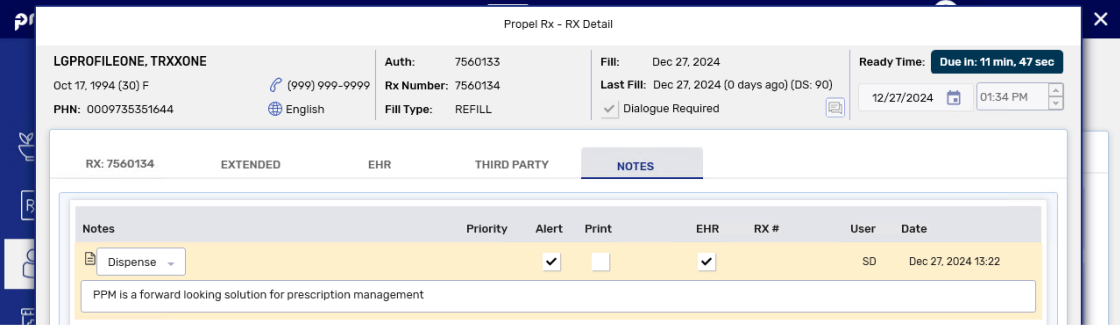
Select the Notes tab.
-
Select Add to enter a new row and enter the note text.
-
Select the EHR checkbox for the note.
-
The dropdown becomes enabled. Select Create or Dispense.
-
If the prescription is a refill, the Create option is not available.
You cannot enter a Create note for a refill prescription, unless it was a refill of a historical prescription that was entered prior to the PPM upgrade.
-
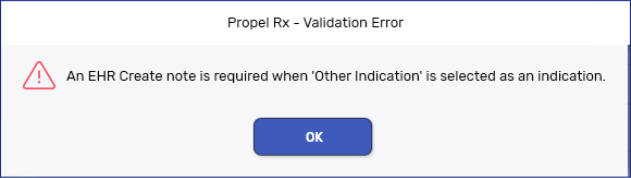
If an Indication of "Other" is selected in the EHR tab, you will be prompted to enter a Create note upon Fill or Hold if one is not entered.
-
-
Select any other note flags if desired. For more information, see Note Flags below.
-
Select Fill or Hold.
Submitting Notes After Filling a Prescription
To submit a prescription note after filling a prescription:
-
Detail the prescription from the Patient Profile or Workbench.
-
Select the Notes tab.
-
If the note already exists, skip to step 4. To add a note, select Add and enter the note text.
-
Select the EHR checkbox for the applicable note.
-
If this is a new or reauthorized prescription placed on Hold, the EHR checkbox is disabled as the prescription has already been created and there is no Dispense yet to attach the note to.
-
-
The dropdown becomes enabled. Only the Dispense option is available as a Create note can only be transmitted at the time of creating a prescription. Select Dispense from the dropdown.
Only one Dispense note is supported by the EHR. You can add more than one Dispense note in Propel Rx but only the most recent note will be displayed on the Rx Authorizations Profile.
-
Select any other note flags if desired. For more information, see Note Flags below.
-
Select Save.
Viewing Create Notes on the EHR
To view notes attached to a Prescription record (Create) on the Rx Authorizations Profile:
-
Open the Rx Authorizations Profile Summary view. For more information on this profile, refer to the Rx Authorizations Profile section of the British Columbia PPM User Guide.
-
From the Rx Authorizations section, select the applicable prescription.
-
Select Detail Rx. The Detailed Prescription view opens.
-
Select the Prescriber Notes folder button
 . The EHR Record Annotation window opens.
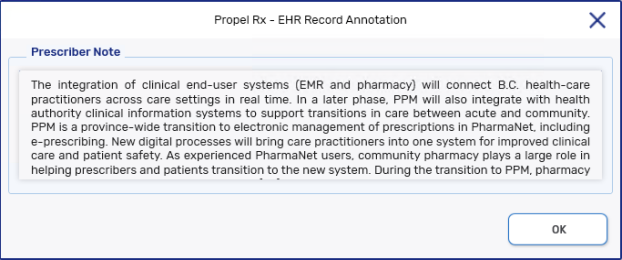
-
Select OK once you have finished reviewing the note.
Viewing Dispense Notes on the EHR
To view notes attached to a Dispense on the Rx Authorizations Profile:
-
Open the Rx Authorizations Profile Summary view. For more information on this profile, refer to the Rx Authorizations Profile section of the British Columbia PPM User Guide.
-
From the Rx Authorizations section, select the applicable prescription.
-
Select Detail Rx. The Detailed Prescription view opens.
-
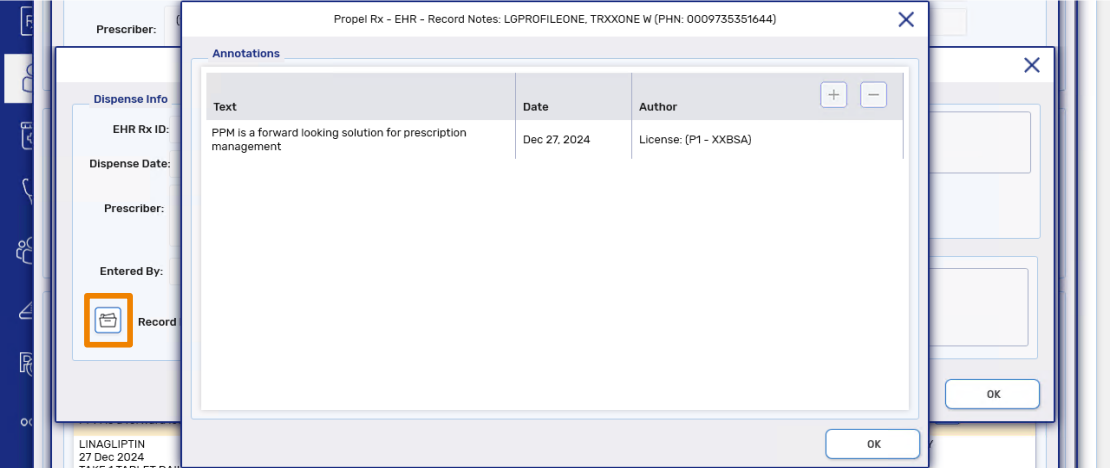
The Dispense note can be viewed from two locations:
-
In the Comment field of the Dispense History section.

-
By detailing the Dispense and selecting the Record Note(s) button
.
-
-
Select OK once you have finished reviewing the note.
When adding a note to a prescription in Propel Rx, you must determine if the note should be added to the patient’s EHR Profile. If it is determined that the note should exist on the patient’s EHR Profile for other healthcare professionals to view, select the EHR checkbox to transmit the note to the EHR. Once the EHR checkbox is selected, a dropdown is available for you to choose whether to attach the note to the Create or Dispense.
If the prescription is not local, you also have the option to add a Record Note directly from the EHR Profile.
If the patient is not synced, a prompt will block you from adding a prescription note until you attempt to sync the patient. To qualify as a sync attempt, at minimum, you must select the PHN expander button  in the Patient Folder. If you attempted to sync the patient but it was unsuccessful, the prompt will not appear again for that patient till the next day. If a note is added when the patient is not synced, the note will not be transmitted to the EHR.
For more information, see the Prescription Notes on the EHR section of the Alberta RTI User Guide.
When adding a note to a prescription, you must determine if the note should be added to the patient’s EHR Profile. If it is determined that the note should exist on the patient’s EHR Profile for other healthcare professionals to view, select the EHR checkbox to transmit the note to the EHR. Once the EHR checkbox is selected, a dropdown is available for you to choose whether to attach the note to the Create or Dispense.
Submitting Notes Before Filling a Prescription
Before filling a prescription, you can enter prescription notes from the following locations.
To enter prescription notes from Intake:
-
From the Workbench, Patient Profile, or Fax tile, select Intake.
-
If your pharmacy has Clinical Review or E-Dialogue enabled, ensure the Data Entry tab is selected.
-
Enter the prescription details.
-
In the Notes section, select the + button.
-
Enter the note text in the given field.
-
Process the prescription as per usual process.
-
The note will be visible from the Notes tab once the prescription is processed into Rx Detail.
-
The EHR flag for the note will default to OFF. To send the note to the EHR, select the EHR checkbox in the Rx Detail Notes tab. For more information, see the process from Rx Detail.
-
To enter prescription notes from Rx Detail:
-
Process a prescription until it reaches Rx Detail.
-
Select the Notes tab.
-
Select Add to enter a new row and enter the note text.
-
Select the EHR checkbox for the note.
 EHR notes cannot exceed 2000 characters
Notes longer than 2000 characters cannot be added to the EHR.
-
The dropdown becomes enabled. Select Create or Dispense.
-
Select any other note flags if desired. For more information, see Note Flags below.
-
Select Fill or Hold.
Submitting Notes After Filling a Prescription
To submit a prescription note after filling a prescription:
-
Detail the prescription from the Patient Profile or Workbench.
-
Select the Notes tab.
-
If the note already exists, skip to step 4. To add a note, select Add and enter the note text.
-
Select the EHR checkbox for the applicable note.
EHR notes cannot exceed 2000 characters
Notes longer than 2000 characters cannot be added to the EHR.
-
The dropdown becomes enabled. Select Create or Dispense.
-
Select any other note flags if desired. For more information, see Note Flags below.
-
Select Save.
Viewing Create Notes on the EHR
Once the Create note is added, you can view it by selecting the prescription from the patient’s EHR Profile and selecting the Record Note(s) folder button .
Viewing Dispense Notes on the EHR
To view Dispense notes, select the prescription from the patient's EHR Profile. In the Dispense History section, select the applicable dispense and then Detail. The note can be viewed by selecting the Record Note(s) folder button .
Prescription notes of up to 2000 characters can be transmitted to the DIS. When adding a prescription note, you have the option to associate the note with the prescription authorization (Create) or its dispense. Once the note is entered, it cannot be edited but it may be retracted from the EHR if needed. Prescription notes can be added for both local and non-local prescriptions.
For more information, see the Prescription Notes section of the Nova Scotia DIS User Guide.
Adding Prescription Notes Before Filling a Prescription
Before filling a prescription, you can enter prescription notes from the following locations.
To add a prescription note from Intake:
-
From the Workbench, Patient Profile, or Fax tile, select Intake.
-
If your pharmacy has Clinical Review or E-Dialogue enabled, ensure the Data Entry tab is selected.
-
Enter the prescription details.
-
In the Notes section, select the + button.
-
Enter the note text in the given field.
-
Process the prescription as per usual process.
-
The note will be visible from the Notes tab once the prescription is processed into Rx Detail.
-
From Rx Detail, you can select the appropriate flags for the note, if applicable. For more information, see Note Flags below.
-
To add a prescription note from Rx Detail:
-
Process a prescription until it reaches Rx Detail.
-
Select the Notes tab.
-
Select Add. A new row appears.
-
Enter the note in the text box.
-
Select the appropriate flags, if applicable. For more information, see Note Flags below.
-
Fill the prescription.
Adding Prescription Notes After Filling a Prescription
To add a prescription note after filling a prescription:
-
Detail the prescription.
-
Select Add. A new row appears.
-
Enter the note in the text box.
-
Select the appropriate flags, if applicable. For more information, see Note Flags below.
-
Select OK.
-
Select Save.
There are two flags that can be selected for a note.

-
Alert flag - displays a note in the Alerts section of Rx Detail.

-
Print flag - Prints the note on the Hard Copy. If Digital Workflow is activated, this flag carries the note over to Clinical Review under the Notes tab. Notes are displayed in the following order in Clinical Review:
-
Prescription notes
-
Patient notes
-
Drug notes
-
Prescriber notes
-